The language
Time to confess: I did not plan anything for the language for the final lesson. I did not want to start a new topic and I also knew that our creative stage will require a lot of time to plan, to organise and to execute. However, because of how our creative part was structured, this lesson created an opportunity for a conversation about our hobbies and preferences and anything favourite. We used ‘I like’ and ‘I love’ a lot and we were able to revise lots of vocabulary from different areas. That is why I have filed this lesson as something that I will be able to reuse with any ‘I like’ vocabulary, perhaps toys, food, sports or animals.
The artist
Since it was our final lesson of the year, I decided to invite some of our esteemed guests one more time, in a revision activity, bringing back their great masterpieces and their self-portraits. I was hoping to show different styles of a self-portrait to inspire the kids. I have also invited someone that should have had her lesson but somehow it had not happened until now. Perhaps maybe that was for a reason, because what Frida Kalho was great at was self-portraits))
Once again, we used a set of wordwall pictures and turned into a guessing game for the older kids and a short presentation for the younger ones. The main aim was to present the self-portrait as a concept and to show the children how many variations of it there are and how many there are possible. And, eventually, to help them make their own decisions about their own self-portraits. We have used these two wordwall sets: simple cards and matching.
The art
It was my decision from the very beginning for us not to draw and not to paint. Some of my students are very talented and great at drawing but even for them drawing a realistic depiction of a human face (their own!) and within one short lesson would not be easy and, in fact, would be way too stressful. Then, of course, there are many of my students for who, because of their age and a lack of practice, that would be an impossible task. For that reason, I decided to go for a collage, based on newspapers clippings.
The materials necessary for the lesson were still very basic: paper, glue, scissors and a pile of different journals, magazines and newspapers. That set might be extended by any illustrations, brochures, postcards and stickers and even drawings which is something that I already did in our space lessons which you will also see in that post.
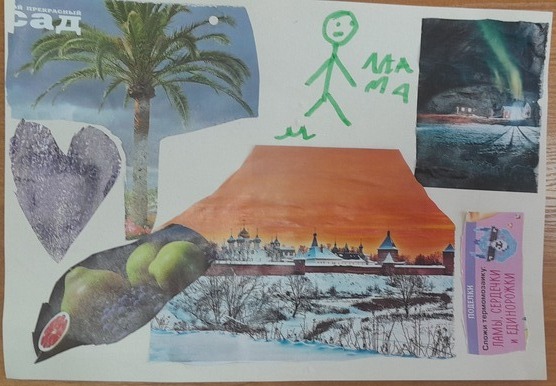
I prepared my model beforehand and I showed it to my students. I said that I can’t draw very well and I chose my self-portrait to be made of all my favourite things which represent me! ‘This is me!’, I said, showing them the picture. We went together through all the bits and pieces, calling them out. When appropriate I added some additional information about these.
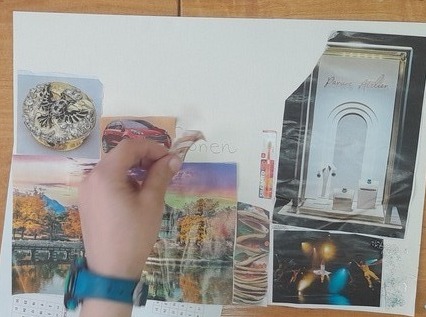
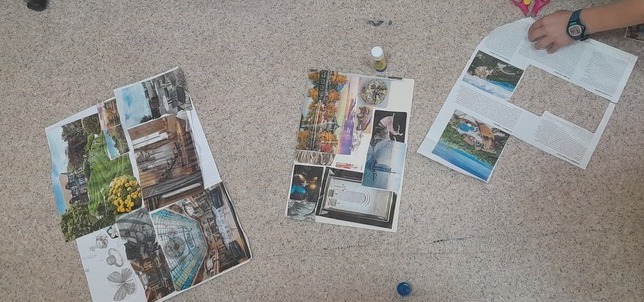
Afterwards, I gave out the sheets of paper, glue and scissors and some of the magazines. We started with looking through them to find something that we like and that could represent us. I was also looking through them, looking for interesting things and helping out (‘I’ve got strawberries. Do you need strawberries, anyone?’). When I taught this lesson again, we all sat around one table with magazines and this set-up was very useful. It was easier to exchange the magazines and pictures and it was easier to clean up later on as all the cuttings were on the same table. When we were ready, we took all the ready-to-glue cuttings back to our tables. That is the way to go.
It went great. It started slowly and with some doubt, but it was plain to see as the creative activity was taking momentum as we went on. The kids were getting a better idea of what to include, they were making choices, regarding what they like and don’t like enough, what else they need and they were making decisions about the composition as the colour and the size of certain cuttings had to be taken into consideration. Real artists at work!
The activity was also an excellent choice as regards mixed ability and the different levels of involvement. Some students decided to fill up both sides of their A4 and A3 paper, some others filled in half of the space on the front page but it still constituted a completed task. Which the creators were happy with.
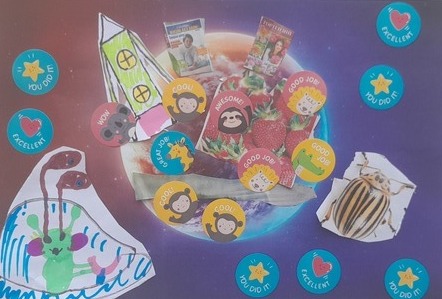
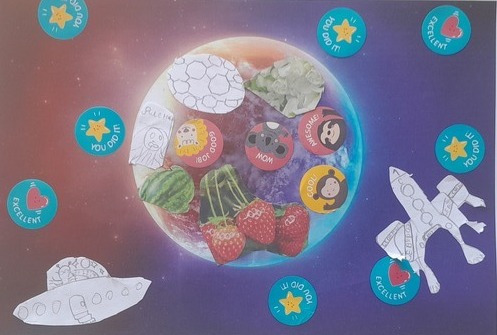
A few days ago, I decided to revisit this task in a camp lesson devoted to space. I do admit, it was a bit of a stretch, trying to drag a self-portrait into that topic but we managed to pull it off. I wanted us to create our own planet which would represent everything that we like in order to revise all of the vocabulary from two units and to have a rounding-up creative task. I brought the magazines and journals but also stickers and just paper and markers. Because it was our space lesson, I prepared a planet / space background that I decided to use instead of a simple white piece of paper. That really made a difference.
Another variation was due to the fact that the batch of the newspapers that I got on the day was not the most exciting one and did not include many relevant pictures. I decided to include our drawings in order to make sure that our planets really do represent us. And guess what? BINGO! This widened the scope and it made our collages a lot more interesting. Just look at the photographs! They are beautiful!
After we were done with preparing the masterpieces, we went on to the presentation. All the students took turns to introduce themselves and then to talk about their pictures using very simple structures (I like…I love…I really like). In the end they asked their peers the question: ‘Do you like my planet?’
Happy teaching!