The language
I have decided that November will be the month of animals, apparently, for no apparent reason whatsover, just because because. This week was our first lesson and we only focused on introducing and revising the vocabulary using the wordwall cards and playing a great animal sounds quiz that I found on youtube. This is my favourite because it has some less obvious animal sounds and it offers three options, with the visuals and the written words on the screen. It makes it quite challenging, even for the adults who play it the first time but it also offers some support so the kids can learn the new language from the game. There is also a feedback aka the answer, a short video with the animal making the same sound. We have played it with a few groups and it has always been fun.
The artist
Our artist of the day was Paul Klee and his Cat and Bird, but, somehow, although I have taught this lesson before and I had all the materials ready, this time round, we did not spend any time on talking about the original picture. I was planning on describing different birds and describing different cats using photographs and then on revising the shapes in the paintings which would be a nice connection between the Month of Shapes (October) and the Month of Animals (November)…But it just didn’t happen. We started a bit later (autumn camp and a general mayhem in the school) and I was really preoccupied with the logistics of the technique. However, now that all our cats are on display, I am going to use this idea in the following lesson.

The art
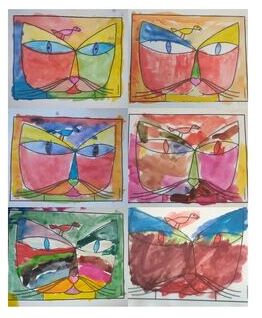
I have used this painting in class but previously we went for simple watercolour and the cats turned out beautiful, too. This was the main aim and the main preoccupation of this lesson because we were to try and to experiment with a completely new technique. I have been on the lookout for new things yesterday and that is how I found out about the melted crayons. My main source was the post on the Artful Parent (which is one of my favourite creative directories) although I adapted it to the needs of our bigger group with a slightly different objectives.
I used the same technique for preparing the crayons, the grater worked just fine (and then all the tiny, unusuable crayons stubs went home to be recycled and melted into brand new crayons, the link to the instructions can be found here) but instead of plates or muffin cups I decided to use sheets of baking parchments. Once I had enough shavings, I simply folded each colour separately and it worked very well during the lesson itself. The kids were passing different little packets to each other, opening them, taking the colour they needed and passing them on.
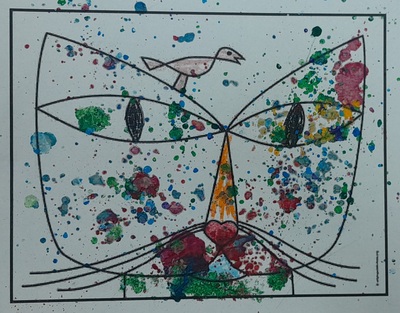
Preparing the picture was super simple, it is easy to find the Klee’s painting as a colouring page and to make copies. We were sitting at a large table (aka all the small desks huddled together) and each child had a large sheet of the baking parchement and a copy of the picture on it, in my attempt to contain the mess.

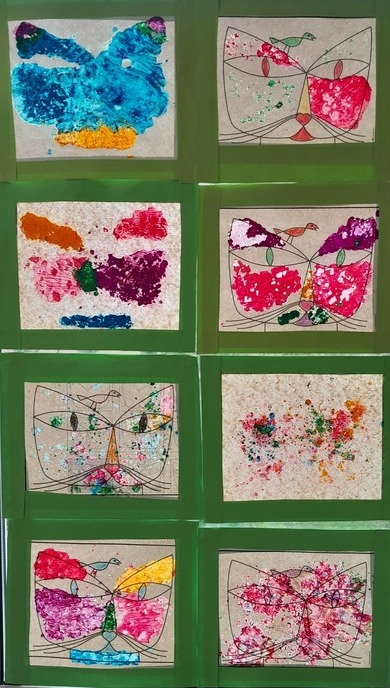
We started with colouring in the smallest shapes (the diamonds in the eyes, the heart nose and the bird). Afterwards, everyone was just picking up the shavings in pinches and putting them on the picture. I also gave out paintbrushes which we used as brooms to sweep the shavings off the lines and unnecessary places. The packets with colours were travelling around the table.
As soon as someone was ready, I showed them how to cover the picture with a sheet of baking parchment (we had to use the one that was under the picture but, ideally, I would have had another one for each child, to keep the tables even cleaner) and I walked around with my iron, ironing one picture after another. The kids peeled off the baking parchment right away and put the pictures away for drying and cooling down. I think, overall, we got better results with covering the picture with the baking parchment the matte side down but there is some room for experiments there.
In the following day, I framed all the pictures in simple frames made from the coloured paper and I put them up in the window. I used all the pictures, those that we intended to be pretty and also the baking parchment prints which turned out to be interesting, too!
It needs to be mentioned that I did not intend these as stained glass, despite the fact that this is how I found them. I only wanted a new and interesting technique but the thin layer of crayons really looks beautiful on the window so this is how I decided to display them in the end.
Overall, I think that it is better to be economical with the shavings. First of all, the pictures seem to be more interesting and, what is more, too much shaving creates a thick layer that might crack while drying and it is also quite likely to stick to the parchment more. I still recycled those (as stained glass pictures and for the second ironing round) and I love how they look but, initially, some kids were a bit disappointed with the outcome.
When I am using the technique again, I will definitely start with drawings, either done by the kids or photocopied, just for the framwork. Unless, of course, we decide to create some melting crayons Jackson Pollock…I would also love to try following that up with the drawings or a simple collage…

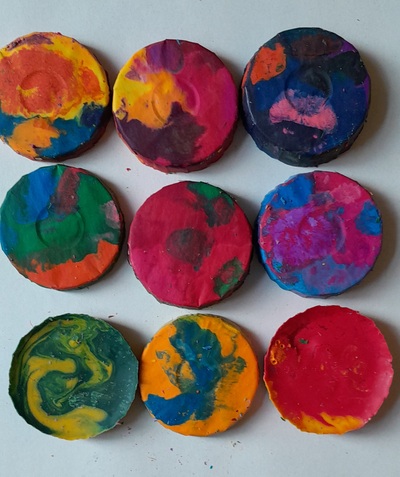
P.S. Here are my new cool, chunky crayons from the recycled crayons stubs and the leftover shavings…

Happy teaching!
