This lesson has been on my mind for a loooooong time. Perhaps, on some level, the whole theme for the month’s theme was somehow fueled by the fact that I wanted to make some dreamcatchers.
The most challenging part in the lesson planning here was figuring out the logistics and the techniques and their adaptation for the use in the young learners Art class. There are the professional level videos, there are the adaptations with the use of paper plates or wooden sticks. There is also this one, that I found just now, just for inspiration for you all. The problem was that they did not match what I already had in my head: I needed a simple solution for the frame and I needed a simple weave that my kids would be able to deal with. From the very start I excluded the option of using any metal frames, I wanted our dreamcatchers to be as natural and organic as possible.
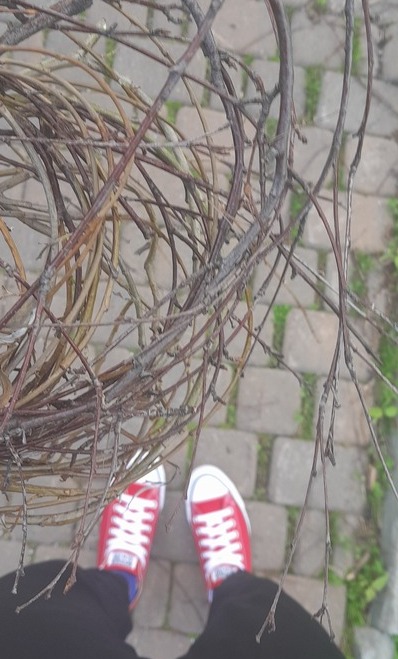
To sort out this problem and to get inspired, I simply went for a walk to see what my neighbourhood can offer, a real naturalist wondering along the river. And I found a solution thanks to the birch tree spinney (a word I learnt today:)) that I have here. It turns out that birch twigs are strong enough and flexible enough after lying for a few days on the ground and can be used for dreamcatchers. Mother Nature helped out! NB I only collected those twigs that were lying on the ground. No tree was harmed during the making of this art.
The artists
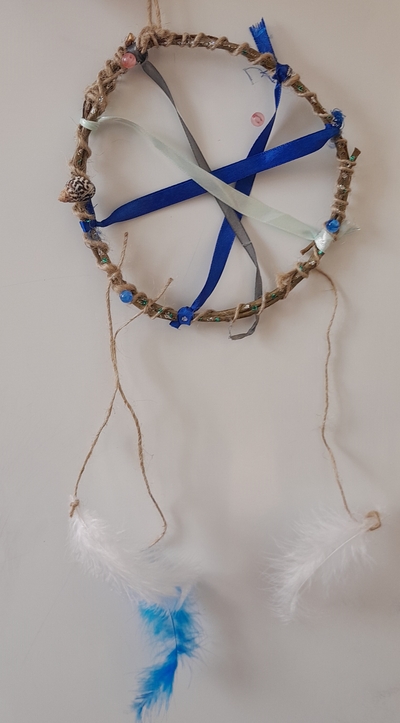
The lesson itself started with the presentation of the art piece that I made at home. We talked about its literal meaning which I explained with clip art and we talked about its origin as the artefacts produced by the members of different tribes in the USA and Canada. We talked a bit about the symbolism, just a little bit (my kids are quite young so we can focus only on the simple concepts but if you have more time, you can find a lot of material here) and we had two guest artists.
Our first guest was Marisa Dube, an Algonquin and Mohawk, an artist from Ontario, who specialises in making beautiful dreamcatchers in the traditional way. The other artist is Janet Echelman that you may know from her Ted Talk, who created a huge Dream Catcher in 2017 in California. I do recommend watching the video with the dreamcatcher in action!
The language
As with all the lessons in May, the language input is minimal and limited to the materials we use in class on the day. This week it was the following set: twigs, beads, feathers, ribbons, string, PVA glue, glitter markers and shells. This set can be adapted, depending on what is available. We went through the cards and through the contents of my bag and started to appear on the table.
The art
Making a dreamcatcher involves a detailed plan for the pre-, while- and post-production stages. Here is how we did it
Pre-production
- I went for a walk and brought enough twigs for all my kids. It was absolutely necessary to check and to confirm that they were flexible enough to be formed into circles.
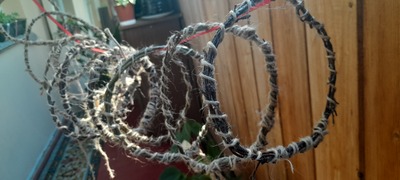
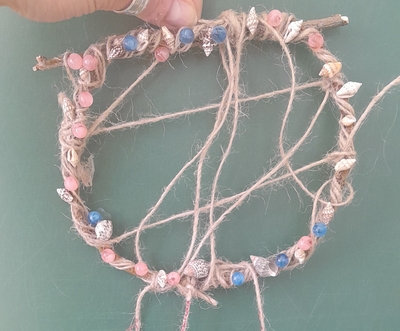
- I created the circles (aka the frames) by bending them into circles and tying them with twine. I also wound a piece of twine around each frame because I knew that we would not have enough time to do that in class although it is an easy task and my kids would be able to complete it all by themselves.
- I also decided to wash the twigs, just in case, I washed them with the cold water and hang them on the balcony to dry. We are in the summer, a streak of beautiful sunny days and that was easy to do. Plus, an unexpected olfactory bonus came out of it, the circles started to give out the smell, a mix of twine and twigs, very pleasant. The kids commented on that in class.
While-production
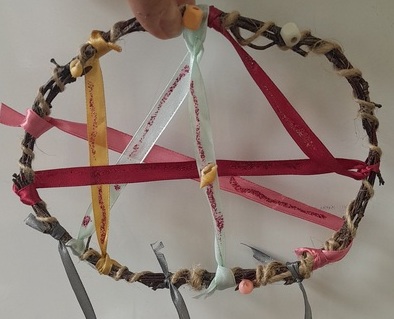
- I gave out the frames and the kids could choose the first material they wanted to use, the ribbons and or the twine. Initially, I wanted to give out long piece of each but that didn’t work out very well, it turned out to be to difficult to managed. I should have thought of that (!!!) but we were able to adapt on the spot. I showed the kids how the cobweb can be made more easily by simply tying a piece of string (or ribbon) across the frame, tying it down on both ends to the frame and cutting off the ends. This way the kids are in charge, they can use three or five ribbons, making their cobweb as simple or as complex as they choose. My youngest pre-schoolers needed some help with tying, especially in the beginning so that is definitely something to thing about. Next time I am doing it with the pre-school group, I am going to include just a warm-up stage, tying ribbons around pencils or sticks, just to practise.
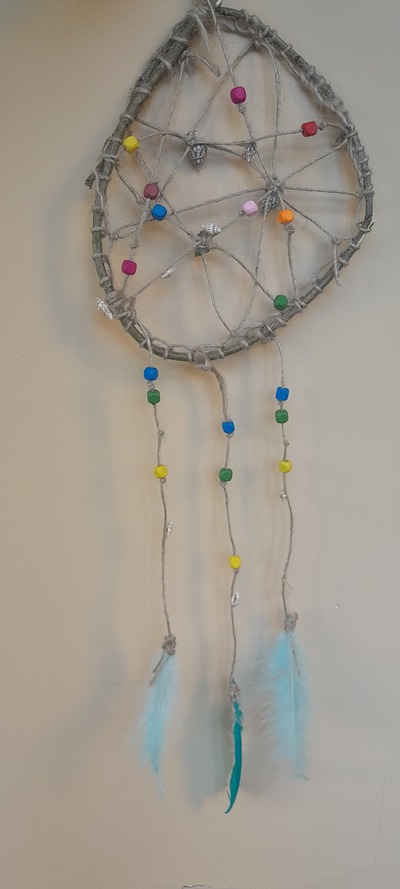
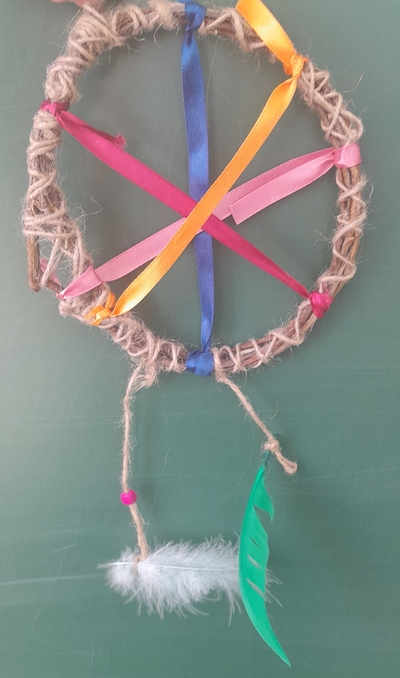
- The second step was attaching the hanging strings which called the tails and the feathers. The students picked up two of three of each and tied them at the bottom of the dreamcatcher.
- The third step was the decoration of the dreamcatcher. I decided to simply glue the beads and the shells with the PVA. I tested the method: it is enough to put a large blob of the glue on the frame covered with the twine or on the ribbons in the cobweb and to leave it to dry for a few hours. The glue will hold the shells and beads and it will become transparent.
- Then, as the final touch, the dreamcatchers can be decorated with the glitter markers and carefully transferred to the window sill for drying.
Why we liked it
- As all the classes and creations in May, this was a lovely journey of discovery, as regards the technique, the materials and the Native American culture, too. Some of the students were a bit withdrawn because of the seemingly high level of complexity of the task but we went quickly from ‘I can’t do it!’ to ‘Look, miss Anka!’. I am not going to lie, this is the greatest outcome ever!
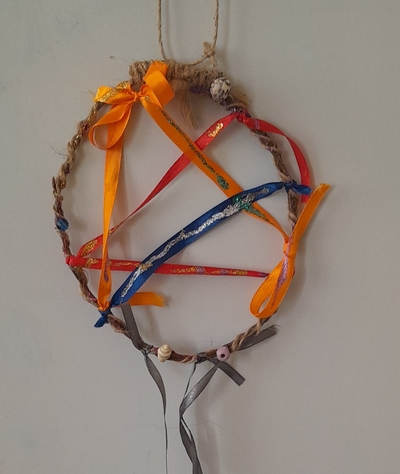
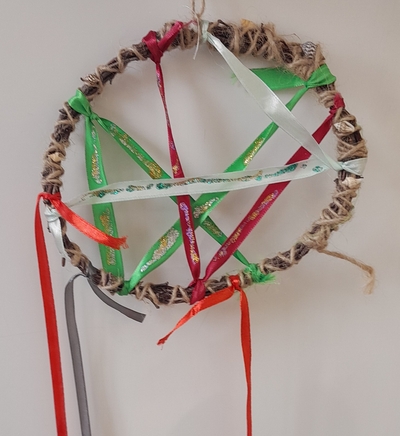
- It was amazing to observe, again, how different students interpreted the task and personalised their dreamcatchers. We all had the same set materials but some students decided to make the cobweb thicker, some others went just for two strings. Some used the twine, some opted for the colourful ribbons. Some prefered the shells, the others really liked the beads. Some used only the organic materials, some couldn’t help but add some glitter. One of my students decided to tie a ribbon, too and it looked great so she added some more, too! Some of my kids aslo found a way of weaving the shells into the twine on the frame and that looks really pretty, too!
- All of the dreamcatchers were left on the window sill to dry and this time I had no difficulty convincing kids to agree to part with their creations. Perhaps it was due to the fact that it was our third Materials May lesson and we have already done it before. However, as soon as we arrived at the school on Tuesday morning, after or even before the first lesson, they kept coming to enquire if they were ready to be taken away. And they were really, really happy with the final product. One of my little ones said, to himself or to the class, ‘Finally I will stop getting the nightmares!’
- There are many ways of making this task a lot more challenging and the more tempting of them is the option of the beads heddled onto the twine or the string which would make the cobweb really pretty. I managed to do it with mine but it was not easy and I didn’t have a thinner twine. If the kids are old enough, they can also try weaving the cobweb in a more conventional dreamcatcher way. The older kids could also potentially use a more reliable glue or perhaps a glue gun. I didn’t want to bring those into the classroom but that is an option that will help you speed up the whole process.
- Admittedly, the activity involved some preparation on the part of the teacher, some more than usual and I understand that not everyone will have enough energy and time to get involved in that. However, it was all SO worth it! Everyone was fully involved, they personalised their work and they considered it important. And their dreamcatchers just make me go ‘Awnn!’ Just have a look yourself!

Happy teaching!
P.S. A request!
It is very simple.
I would like to know a tiny little bit more about my readers. There are so many of you, popping in here, again and again, and the numbers of visitors and visits are going up and make my heart sweel with joy. But I realised I don’t know anything about my readers and I would love to know, a tiny little bit more.
Hence the survey.