The language
February is our Fun Cartoon February but language-wise I decided to focus on Present Continuous to work on verbs and to get us ready for storytelling later on in the year. This is also a great TPR-friendly structure that comes in very handy and gives us a chance to move a little bit when we meet at around 4 pm, already a bit tired after a whole long day at school. We have a set of basic activities for that, tried and tested, that include making sentences based on stencils, Pete the Cat and his ‘Rocking in my school shoes’ (video and song) and a miming-guessing game (the calss asking:’Sasha, what are you doing?’, Sasha demonstrating and the kids guessing).
The artist
The day has come! Jean-Michel Basquiat is here! It has taken some time for him to arrive (mea culpa!) but it is finally happening. I was racking my brain in order to find a match for February and my own alliteration challenge because I really (really) wanted to deal with Basquiat (and with Roy Lichtenstein and Keith Harring) as soon as possible.
I introduced him to my students in the usual way (name, photo, country, favourite thing) and we looked at a few of his creations, including one of the self-portraits, cats and his ‘Robot man’. Funnily enough, my kids found some of his pictures a bit scary. That is why we didn’t spend a lot of time on that and we moved on to his technique because that was, really, my main aim for this lesson.
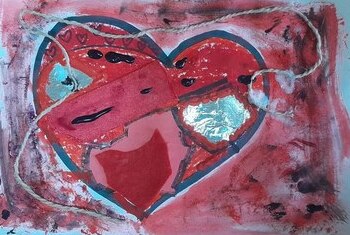
Before the lesson I prepared my own model of the heart because it made it a lot more easier to explain what ‘layering’ is all about. We looked all of the materials I prepared on the table and we tried to count how many I used in my picture and what they were.
The art
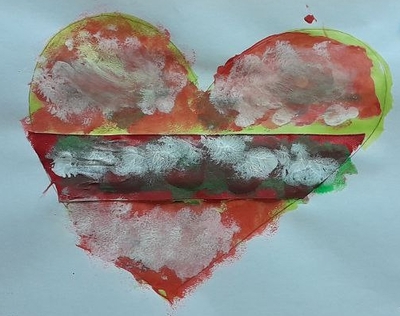
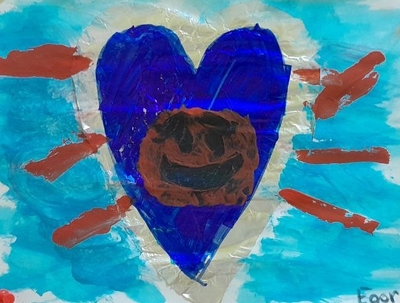
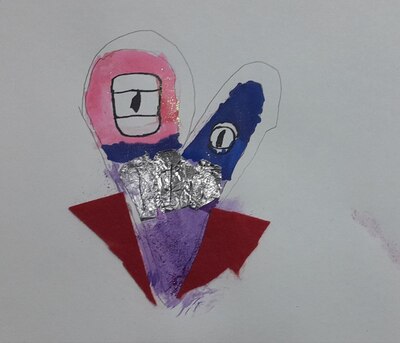
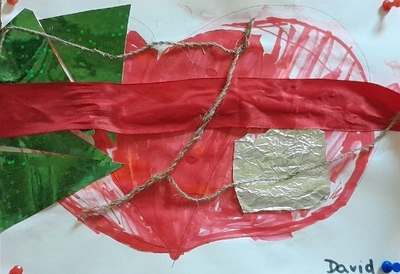
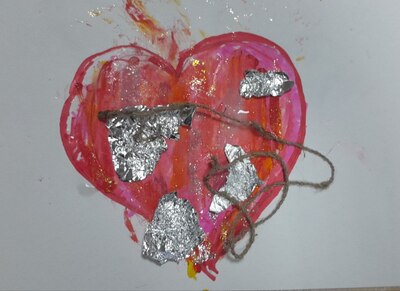
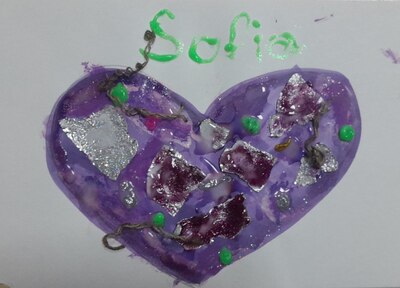
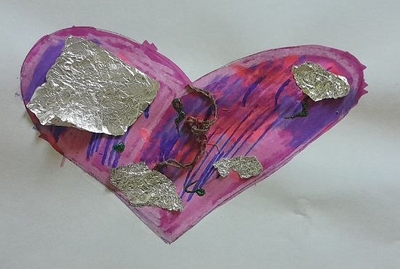
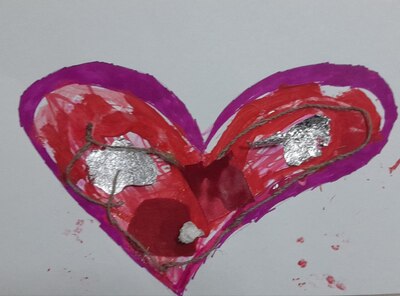
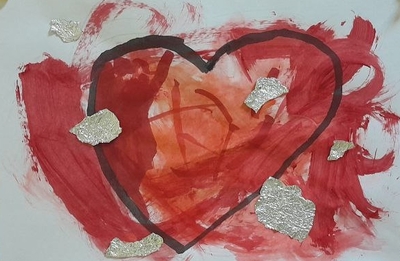
Apart from the number of layers that my picture helped with, we also made a list of stages that we need to go through and I wrote them on the board: 1. the draft with a pencil, 2. the outline with a marker, 3. and more: all of the other materials, as many as you want and 4. the final one: glitter. The only thing that was obligatory for everyone was the topic, a heart as we had our lesson in the week of St. Valentine’s Day that our school was getting ready for.
This was a great process art lesson, an amazing process art lesson, in fact. I experienced it myself, while creating my own heart. Apart from just having fun, working with all of the materials and resources and experimenting with them brought me a lot of pleasure. Certainly, I was hoping that my students will also be able to experience that. Guess what? They did!
Different children chose their own approach to the resources and the number of different materials and layers to work with. I didn’t want to interfere with that, even though some of them chose only or two resources. I tried to suggest other solutions but I respected their final decisions. This was an interesting balance to those of my students who went over the top and used absolutely every single material that I had prepared. Or more, just because they found some random bits of coloured paper in the glue box.


My favourite thing was probably the fact that the kids went into the task with a completely open mind, willing to experiment, to try new resources and the new combinations of resources and to learn from each other, as well. We discovered that tinfoil can be torn and cut, it can be coloured and glued or glued and painted over. I shared with the kids that you can paint with acrylic paints and a wet tissue and I looked at how they liked working with our almost professional acrylic paints and that a piece of string actually makes a difference. I myself added a few more bits to my picture just observing what my students were doing.
One of my students came to our class for the first time ever and it was lovely to see how unexpectedly creative he is and how beautifully he applied the technique to create his heart.
Have a look at the beautiful pieces in our gallery…
Happy teaching!