Or about my favourite resource in this academic year, hands down.
Ingredients
A notebook for each student and a box to keep all the class notebooks. These notebooks don’t travel home, they live in the classroom.
Some writing materials: pencils, markers, crayons.
Why we love it
For all of the students in all the groups where I introduced notebooks (and that’s everybody, pre-primary, primary, juniors and teens, apart from my pre-primary level 1 and 2, who are still only 3 and 4 years old, they are going to get theirs a bit later in the year), this has become a surprisingly wonderful way to express their personality and to become even more present in the classroom. When I gave these out, many of my students of all ages were inquiring what they should write on the front page or on the cover page. I suppose it is because there might be some specific regulations at their schools regarding what needs to be and what can be written there. When I just shrugged my arms and said ‘I have no idea. It is your notebook. Write what you want‘, many of them looked at me in disbelief and then started to write some elaborate names in Russian or some made-up names and nicknames or just their names, in a variety of fonts and styles.
Equally, the format of the note-taking is highly personalised, too. There are certain activities that we use these notes for (see below) and sometimes they involve a structure or a format which is the same to everyone but, at the same time, the kids are in charge as regards the choice of the writing materials, colours or the ratio between text and the drawings.
It is the students’ personal space in the classroom, too. We share what we have written but I hardly ever look into those notes, unless they ask me to or unless they need help with some vocabulary or structures. Since this is a new project and since I am just developing it and discovering its potential and its potholes, I have just realised that I will have to include some kind of delayed error correction in the process, for instance by reading the entries and contributions to fish out some of the spelling or grammar mistakes.
It give the students an opportunity to write and to read more.
It is an opportunity to keep all the notes and all the ideas in one place and to go back to them, to review, to remember, to reminisce or to recycle.
Notebooks for the high level students (C1) are our way of breaking into the least favourite skills ie writing. After we have finished a receptive skill task such as exam reading and exam listening, we follow it up with a 50-word (plus) summary in the notebooks, steering away from any specific genre or format, just simple note-taking that now compliment our regular ‘What do you think?’ speaking sessions. We go back to these notes in the following lessons, to check whether our views have changed in any way, whether they have developed but also, very importantly, to edit and to improve, when possible.
Notebooks for juniors(B1) have been used in a variety of ways related to the vocabulary we study. First of all, they are the opportunity for the students to reflect on the vocabulary they have learnt. At the end of the unit, we look at all the phrases, structures and words and categorise them. The categorise we use change all the time and have included the following: easy words and difficult words, useful words and not-so-useful words, interesting words and not-so-interesting words and I am hoping to add more to this list. In the future I would also like the kids to use their own categories in the future. This kind of an activity also involves a discussion and sharing the rationale for our choices (and that is my favourite part of the whole activity). We use the notebooks also to work on the additional vocabulary, not included in the coursebook but still worth knowing. Sometimes we create the lists ourselves (ie while describing the objects, we also revised a list of materials) or we work on the lists that I prepare (ie a few weather idioms that we discussed while going through the topic of ‘extreme weather’). Last but not least, this is also where we take note of the emergent language, in the section at the end of the notebook called ‘Our special words’. I keep track of these on the whiteboard (the left margin) but I encourage the students to take a note of these (or some of these) in their notebooks.
Notebooks for primary (A2) are probably the most multi-functional among all the age groups. First of all, we use them to complete our portfolio tasks that are included in our coursebooks, one task for every two units. For these, each student gets a pre-prepared template, a notebook-page size, which they glue in and then use for whichever task we have such as the personal file (used in an interview) or the list of the adjectives to describe animals (used later in Our Big Animal Quiz) and so on. We use it also to personalise the vocabulary that we learn, for example after we have learnt the jungle vocabulary, the kids were asked to arrange all the new words in the order of their own preference, number 1 being their favourite word, number 9 being their least favourite. As with the older students, we later talked about the reasons for our arrangements. Last but not least, we use the notebooks to prepare for any student-generatedgames that we play. They are especially useful in all the guessing games and are much better than any small cars because the notebooks are not transparent and, because of their format, they help the kids to keep their secret words really secret. You can find out more about this game here.
Notebooks for pre-primary (pre-A1) is a serious step towards developing reading and writing skills. Now, I am not sure whether it is going to fit all the pre-primary classes (because some children are not ready and some programme do not even include any literacy elements) but this is what works for us. My students are 5 and 6 at this point and we have been doing a lot of literacy activities for about a year now. We started relatively early simply because the kids showed interest in the written word and I realised they were ready. We went slowly but with great results and I can safely say that now it is their favourite part of the lesson. Last year we did a lot of writing on the laminated erasable pages, with whiteboard markers, this year we moved on to notebooks. We use the notebooks to copy the words that we learn, in two or three batches, with only four or five words per lesson, not to overwhelm the kids. Kids usually choose to add little drawings to these so our notebooks are slowly becoming picture dictionaries. Our notebooks are also used in pairwork, for example in a survey on the food we like and we don’t like in which the students used a pre-prepared chart (printed, cut out and glued in by the teacher) to interview their partners and to ‘take notes’ in the form of pluses and minues. I found out that the notebooks really help to set-up and to run a pair-work activity. The notebooks are also going to help us to maintain continuity with the longer-term projects such as the reading of a phonics story such as ‘A fat cat on the mat’ by Usborne and all the related activities. They will be completed over a series of lessons but thanks to the notebooks we will be able to get back to them and to revise in a more SS-centred way. Or so I am hoping.
There is no other way of putting it is: it is a proper Notebook Love (or Тетрадка Love) and it is almost ridiculous that such a tiny and irrelevant thing, at RUB 40 a piece (about 50 cents) could have such an impact on our lessons with its potential for creativity, reflection, personalisation…And, mind you, it’s been only two months. Something tells me, the best is yet to come.
Happy teaching!
P.S. Of course I have forgotten to take proper photos in the classroom, of all the cool things in our notebooks. I will try to make up for it, at one point. For now, just some cool notebooks that are kicking about the house.
*) Тетрадка – a dimunitive of the word тетрадь (notebook)
This is the second post in the series devoted to no/little prep activities that might save your teaching skin (and sanity) when unexpectedly you find yourself in the classroom and no Earthly rules apply, due to the unfortunate combination of factors. Today, a lesson for the little people.
Pre-scriptum #1 Don’t forget to check out the introduction to the series, here and the first episode, here.
Pre-scriptum #2 All the photos in this post are the memories of all these blissful days when there WAS time to prepare…
Pre-scriptum # 3 Just as a reminder, these are the rules of the game: due to some combination of factors, regardless of who might be to blame, a teacher unexpectedly finds herself (himself) in a situation when there is no lesson plan, very few resources (perhaps nothing or almost nothing from The List) and you still have to survive a lesson with an age group. Here are some ideas on how to survive that. And the kids are about to enter the room in 3…2…1…
First things first
No matter how little time you have and whether you have been to this particular Mars before (I mean the school), do not let the kids into the classroom before the lesson. If you want to read more about why not, you can find my earlier post here.
If it so happens that your students are already in the classroom, don’t worry, nothing is lost. You can just take all the kids out first, line them up, count them and take them into the classroom, one by one. You are not going to do it in order to kill the lesson time, quite the contrary, it is going to help to re-introduce the order and to show the children who is in charge. Even if they don’t know you or, especially if they don’t know you. They will be curious and it will be easier to manage them.
If you really don’t want to take them out or if it is impossible, you can move to step two: try to include an activity that the whole group is going to be involved in. Get everyone to sit in a circle (on the stools or on the carpet) or to stand in a circle, wait for the kids to calm down (counting from 10 to 0 showing your fingers might help) and the proceed with a few miming activities. There is no need to give very specific instructions or to explain what you are going to do, use ‘a punctuation mark’, for instance (3,2,1 everybody is…) and add an activity. ‘Everybody is clapping’, ‘Everybody is marching’, ‘Everybody is waving’, ‘Everybody is dancing’, etc. For the kids it will be an opportunity to be involved in some movement and it will help them to focus in the following activities. It will be also a chance to do something together, as a group. For the teacher it will be a chance to show authority and to see how follows the rules.
Say hello and get the kids’ names will be the next step. The kids will have already listened to you, they have started the lesson in a fun way and that is the best time to find out their names. If the group is a new one, I like to put their names on the board (ideally using different colour markers so that the kids can recognise their names, too, or by adding a different symbol for each child, something that is easy to draw i.e. a flower, a car, a star etc) .
Revision might not be applicable but regardless of the kids’ level, I would like to go back to something that they are likely to know and respond to well, and one of such topics are colours and numbers. Some of the activities that are easily implemented can include:
counting a few times, first chorally, then individually, using different voices (happy, sad, angry, sleepy) and pace (very fast, very slow)
counting forward and counting backwards or counting with skipping one of the numbers or by skipping every other number and replacing it with a random word. Here, I would use ‘a banana’ or ‘a zebra’ because they are the same in Russian and they are definitely not a number so they will be easy to use in this activity. You can count again but in a crazy way, for instance ‘One, zebra, three, zebra, five, zebra, seven, zebra, nine, zebra’ etc.
counting things in the classroom ie boys and girls present, all the hands, legs and noses present, lamps, windows, pictures. It is not a given that the children will know all these words but they can still count them with the teacher.
colours: first revise the colours with all the objects that are available in the classroom. Kids usually wear colourful clothes so your students alone are quite likely to have all the colours on them already.
I can see, I can see, I can see something….blue, which is a version of ‘I spy with my little eye’ but with a slightly easier rhyme and much easier to show (I tap my chest twice for ‘I’ and ‘can’ and then I point to my eyes). When the kids hear the colour, they point at something of that colour. If the group is strong, the students can take turns and be the teacher. It might be also possible to add two adjectives here ‘big’ and ‘small’ and then it turns into a real game, with the entire classroom.
Option 1: there are flashcards on Mars and, if so, I pick up the folder with animals.
Why? Because animals are one of the coolest topics that most kids can relate to, a generative topic appropriate for the more or less ‘advanced’, a topic that can be made digestible because at least some of the animals can be chosen based on principle ‘the same / similar as in L1’, this topic lends itself to a great variety of activities.
new vocabulary: introduction using voices, drilling, riddles (What’s this?), missing cards
miming: first the teacher mimes the animals for the kids, then the kids mime for each other
new structures: a variety of structures can be used here ie I am green / yellow / blue, I am big / small / happy / sad / angry, I can run / fly / swim, I like grass / meat / fish / fruit
focused task: based on my craft activity ‘don’t you just love a circle’. The original activity involves some additional resources (coloured paper and glue for kids) and preparation (pre-cutting the circles for each child, had to be done before the lesson) but it can be skipped, too as all the circles that are used for the basis of all the animals can be drawn by the kids. You can start with drawing circles in the air and drawing circles with a finger on the desk. Only afterwards the teacher gives out a piece of paper and a simple pencil per student. The teacher asks the kids to draw five circles on the paper and, step by step, the kids transform all the circles into animals. The cat, the frog, the bird and the fish are among the easier ones. The kids are able to draw their own as long as the teacher leads them through the activity and transforms the circles into animals, step by step, drawing on the board for the kids to copy. Afterwards, if there are crayons or markers, the kids can colour the animals. If not, they can do it at home.
focused task production: once the circle animals are ready, they can be used in a listening / speaking game. The teacher makes sentences about animals, using the first singular and the structures that the students have practised ie I am big. The kids listen and point at one of the animals. Afterwards the kids take turns to produce sentences.
songs: I would probably go for ‘Old McDonald’s’ because this is a song that can be sung from memory, almost forever, with different animal voices that the kids will be able to join and I am sure that nobody will mind if our farm of Mr McDonald also houses tigers, elephants and seals…
Option 2: there are no flashcards on Mars and, if so, I choose the topic: shapes
Why? Because shapes are one of the topics that is definitely under-loved and under-appreciated in all the coursebooks, despite the fact that shapes are everywhere around us and that shapes is teaching logic, maths and developing cognitive skills. Children are familiar with them and they can be used in a variety of ways.
new vocabulary: shapes flashcards are very easy to produce, even if there is no coloured paper or no time to colour, they can be easily cut out of white paper, in the worst case scenario. I would use these to introduce and practise vocabulary. If there was no time to cut things out, I would draw them on the board or on a piece of paper, while already in class, and this would be my main tool to work with the new vocabulary.
practice: drill the new words using different voices, point at the shape, draw the shape in the air / on the floor
movement: make the shape with your hands, make the shape with your friends with kids holding hands, standing on the carpet, the circle will be the easiest to do and to start with, all the other ones can be started with the kids standing as the tops of the angles in each shapes
Can you see a circle?: the teacher draws one of the shapes on the board and asks the kids to look for circles in the classroom and pointing at them (‘I can see a circle’). These circles can also be counted.
focused task / production (1): the kids practise drawing in the air and on the desk with their fingers. The teacher gives out paper and pencils. The teacher draws a circle on the board and the kids on their papers. The teacher draws the eyes and the smile, the students choose the emotions for their shapes. They proceed with the other shapes. Apart from the circle, the other shapes might be challenging for some children and they need to be taught how to draw these. The teacher can start with marking three dots for the triangle first and then connecting them with lines and the same for the other shapes. If time, the kids can turn their shapes into characters by adding legs and arms. The teacher and the students describe their shapes ie My circle is happy.
focused task / production (2): the kids practise drawing in the air and on the desk with their fingers. The teacher gives out paper and pencils. The teacher dictates and models, the students draw the shapes, one by one. The teacher says ‘It’s a circle’, then she covers the circle and turns into something else ie a ball, a clock, a flower, a balloon, etc. The teacher says ‘Abracadabra, it’s a clock’. The kids turn their circles into a clock. The teacher says ‘It’s a clock’, the kids repeat. Then the same procedure with the other shapes: the square (a house, a picture, a book, a present), the rectangle (a robot, a car, a tower), the rhombus (a kite, a flower), the triangle (a boat, a house, a volcano).
Coda
I wouldn’t like you to think, dear reader, that I do not care about the standards and that, as a teacher or as a mentor, I might accept the approach in which the teacher enters the classroom ‘just to hang out’ or ‘to babysit’ perhaps following what Reilly and Ward (1997) have been promoting in their book (the two quotes that I still haven’t forgiven them for and I doubt I ever will)*. That is definitely NOT the case.
We are teachers and we are professionals, we enter the classroom to impart knowledge, not to kill the time. However, there might be situations in which you actually are as if on another planet and you want to use the lesson time as well as it is only possibly, albeit with very limited resources and no time to prepare. I hope that never happens to you in real life but if it does, now you are better prepared for that. Hopefully.
Happy teaching!
P.S.
Here is a real life account of a first lesson with VYL from Sandy Millin, with some more ideas.
P.P.S. The unforgiven
Quote 1: ‘There are certain advantages in teaching the pre-school age group. One of the main bonuses for the teacher is that there are usually no strict syllabuses to follow, no tests, and no performance objectives to be met’ (Reilly and Ward, 1997: 7)
Quote 2: ‘However, if you have been using English, they will have been learning even if you have not done a single thing on your lesson plan’ (Reilly and Ward, 1997: 8).
Both quotes come from the book by Vanessa Reilly and Sheila M. Ward, Very Young Learners, published by OUP in 1997. I do appreciate the authors as for a very (very, very, very) long time (20 years!!!!), this was the only book that teachers could use to get any idea about the age group and the activities that might be used in the classroom. I will be eternally grateful to the authors for being there to support many generations of VYL teachers. BUT at the same time it makes me very unhappy that these two quotes found their way into the book (even in my 2011 edition) and that for two decades these VYL teachers were learning that, essentially, it does not matter what you do with your pre-schoolers as long as you do it in L2. It does not matter whether they speak, it does not matter what they take out anything of the lesson and whether there is any progress at all.
That is, of course, not true. I doubt it was true in 1997 and it definitely is not true in 2021. So there.
It is one of those lines that you deliver, sometimes carelessly: ‘This is my favourite ….’, often followed by a softening line, ‘Oh, well, at least one of the top 10.’ I do it all the time. Carefreely. Until, last week, one of my readers and fellow teachers, commented, ‘Ok, but what are the other nine out of this 10?’
And I thought that it will be a perfect idea for a new post. So here we are.
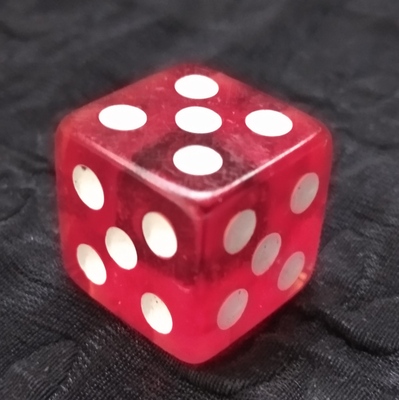
One: Dice
Definitely, one of my favourites, the one that I always have in my bag and the one that I have managed to use with the little ones and with the older ones. There is already a post on that. You can find it here.
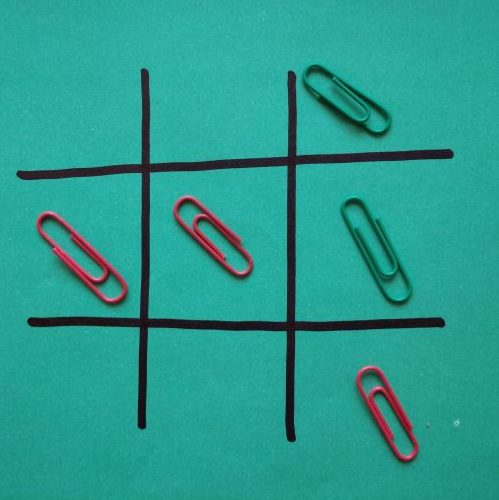
Two: Noughts and crosses grid
Another ‘love of my life’, something that I have been using for ages and adapting and perfecting on the way. Obviously, right now, I cannot simply live without this resource. Nor can my students. Some of the ways of using it, there are a few posts that you can read: here – a post about using noughts and crosses with primary or pre-primary, here – another one on using noughts and crosses in storytelling, here – on using noughts and crosses with visuals.
The super important advantage is that, if needed and there is no template and no handout, it can be easily re-created on the board or even by the students, on a piece of paper and filled up with words, phrases or even pictures for the students to use later.
Three: Wordwall
This is the online tool, (www.wordwall.net) that, for me personally, was the number 1 discovery of the lockdown times. For those of you who are not yet familiar with it, it is an online community that shares online games which can be used to learn English among subjects. There are a great number of templates available such as simple cards, a spinner, a quiz, a wordsearch etc. Anyone can join the community and the community library for free. Those teachers who want to create their own games and to share them with the said community, have to choose a plan. That part might be a bit of a hurdle for some, but $ 2.50 or $3.50 per month is a ridiculously small amount of money to pay for the privilege of creating an unlimited number of activities for the particular texts, coursebooks or videos that you want to use with your students, especially if you teach a few groups of the same level / coursebook or, if, like me, you want to share these activities with all the teachers in your school.
I am using these activities with all levels and age groups, both with my students and my trainee teachers, sometimes in class, sometimes as an additional homework.
Here are a few examples of the templates and the activities that we use them in
simple cards, instead of electronic flashcards, here ‘My day‘, just to introduce the vocabulary
a similar set of simple cards but used with a specific structure(s). This one here was used with my primary students to share opinions about different activities.
boxes used in a speaking game ‘Tell me about it‘: students choose one of the boxes and talk about the object, animal, person. They have to produce a required number of sentences and they get a certain number of points in each round.
pelmanism online. Here students have to match a country with a product and we used it as an introduction in a lesson on the passive voice.
a quiz to develop the early literacy skills with pre-primary. This one here was used to practise the letters, sounds and the key words for each of there.
In my classroom, we actually have both, three mini-whiteboards and about ten erasable notebooks and we use them with all my groups. With my pre-primary students and the first and second year of primary, they are our main tool in all the literacy-related activities. Holding a big and thick marker is easier than managing a pencil or a pen, writing on the surface which is smooth and almost slipper means that the students do not have to apply so much strength and can produce a line more easily and, last but not least, even if they make a mistake (or if they are not very happy with what they produce), it is very easily to repair a mis-shaped ‘a’ or ‘n’. All these features make these resources especially suitable.
With my younger students we use these in the following activities:
doing the lines (rarely, I prefer to set it as homework)
copying the words from the board
the game of ‘fake scrabble’ – students in pairs, using two markers of different colours, take turns to add more and more words to the initial word set by the teacher, during a set amount of time. The students earn points for each letter in their words. The longer words they add, the more points they earn.
the game of ‘scramble, unscramble’ – teacher dictates words, letter by letter, in a random order. Students write these down and try to unscramble the word. This is not a competitive game, no points are awarded.
the game of ‘how many words’ – teacher writes on the board a sentence in English ie ‘We love to play games in English‘, students work in pairs and try to make a list of new words that can be put together using some of the letters in the sentences, for example ‘lamp’ because all these letters feature in the sentence. Students can reuse all the letters, for example they can use the letter ‘s’ in quite a few words but the words which contain more than two letters ‘s’ because there are only two of them in the sentence. This is a competitive game and there are points at the end of the game.
the game of ‘lazy bingo’ – students simply make a list of seven or ten words from the set that is being practised at the moment ie toys. Teacher then calls out the words in a random order, the student or the team which crosses or erases all their words first, wins the game.
depending on the set up in the classroom, I sometimes use the erasable whiteboards to put up the langauge that I want the students to use or the questions to discuss, especially if we are sitting away from the board.
We use the same games with my older students but, apart from that, we also use these in these activities:
a variety of quizzes – students write their answers, either full words or simply letters ‘a’, ‘b’ or ‘c’ in multiple answer quizzes
short story writing – writing a Flyers or KET story, whole class writing in which the students contribute only a sentence or a word at a time and then exchange the notebooks, etc.
the game of ‘A to Z’ – students work in pairs, write the letters of the alphabet in a column. Later on, their main task is to come up with one word for each letter of the alphabet within a certain topic. There is a time limit and the team or pair who can make the longest list, wins the challenge. In the follow up, we reflect on these words discussing the questions such as: What is the strangest word here? What is the best word? Are there any words you don’t know? Which words you don’t approve of? This game works best at the start of a new topic and it helps the teacher to understand whether the new topic is actually new to the group and, consequently, to adapt the classroom procedures.
Understandably, in all of the activities, the mini-whiteboards or the earasable workbooks can be easily replaced with a simple piece of paper and a pencil and the activities would work just as well. Using the whiteboards simply adds to the excitement and it can be a nice way of spicing up the lesson.
Five: Tornadoes aka Points cards
Long, long time ago, at one of the trainings, someone showed us how to play the game of ‘Guns, Bombs and Lives’. I do not remember who it was (but thank you, anonymous benefactor!).
It was a very simple game of gamifying any boring activity such any typical controlled practice exercise. Students were giving their answers and uncovering the boxes in the grid. If they found ‘a gun’, they lost one of their three initial lives, if they found ‘a bomb’, they could steal a life from one of the other teams. If they found ‘a heart’, they did gain an additional life. There was a similar version of the same game, called Tornadoes’.
It worked very well and it helped to encourage the kids to get involved and to stay involved in the controlled practice activities but, even with the older students, I did not like the idea of all the guns, bombs and natural disasters, all the destruction that I personally would be bringing into the classroom. The other contributing factor was the fact that, at the time, I desperately needed a system points that I could also use with my 1-1 students. The regular grid would not work (it was always created by the teacher). Our game of Tornadoes had to transform into something else.
It did. It underwent a proper evolution as with my student, Nick, we did come up with new ideas, cards and tasks and we would play it for a few times, like proper gamers, and then, based on the data collected, we would accept these new rules or reject them.
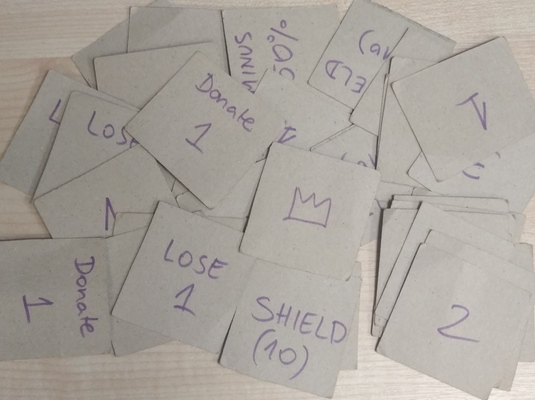
At the moment, in its 4.0 we have the following cards:
the simple: 1, 2, 5 points
donate 1, 2, 5 points (you give away some of your points to one of the other teams)
lose 1, 2, 5 points (you lose some of your points, no one gets them)
add 50% of the number of your points
lose 50% of the number of your points
multiply your points by 2
take away 1, 2, 5 points from one of the other teams
shield which you can use to protect yourself agains any bad luck which, if not used, turns into 10 points at the end of the game
the crown – whoever picks the crown is the ultimate winner, regardless of the number of points collected. We add this card to the deck only for the final round.
You can see the cards in the photo. I have been using them for about three years now and I have just realised that it is the high time to print and to laminate them…Here is my new resolution for the new academic year.
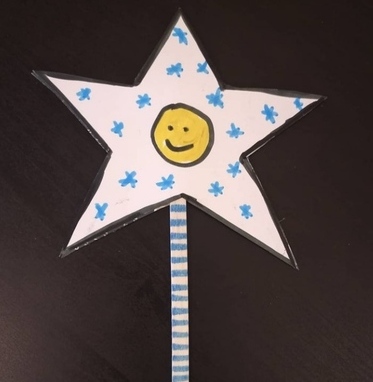
Six: Magic wand
Well, yes, this particular tool is used only with my pre-schoolers, but it is an absolute staple food with this particular age group.
Magic wands can be found in many different toy shops or kiosks but it is so much fun to be making one! It is actually so easy that it can be turned into a craft activity with preschoolers. At the same time, a magic wand is not even necessary. Kids are amazing and, really, if played properly a simple pencil will do the job just as well. For that reason, when we used to study online with my students, I was using my handmade magic wand and my students were using markers, pencils, whatever was lying nearest!
Magic wands are used in one activity that can have many different variations. Whoever is wielding the wand is responsible for casting ‘the spell’ of their choice. The whole group, including the teacher has to perform the action and to mime. We use a simple rhyme ‘Abracadabra, 1, 2, 3. You are…’ with many different endings:
verbs ‘You are dancing’
nouns ‘You are a cat’
nouns with adjectives ‘You are a happy cat’, ‘You are an angry princess’
Seven: Word picturebooks
If I were to go to Mars and take one set of resources, I would love to take a set of visuals. If, however, I had a limited space in my bag and / or no access to google, I would take the printed version (because I am lucky to have the hard copy) of Cambridge YLE Picture Wordlist, Starters, Movers and Flyers. These are beautifully done picture scenes, especially useful for those of us who prepare kids for YL exams but, at the same time, so lovely and colourful, that I could actually live with them in a teen or adult group.
You can download them from here: Starters, Movers and Flyers, and if only anyone even mildly related to Cambridge University Press is reading this, here is my message: please, print them and sell them! We are going to buy them.
Eight: Small pieces of paper (basically)
Well, this is so basic that it is almost disappointing but, looking at the regular proceedings in my classes, I have to be honest and say that, yes, small pieces of paper (A4 white or coloured cut up into 16 or 32) appear there regularly and frequently.
Sometimes, I prepare them myself, they are typed up, printed and cut up but, since this whole series is devoted to the minimal resources and last-minute solutions, I will not include these here. The main assumption is: no time for any pre-lesson preparations. All of the activities mentioned before start with the teacher giving out a number of cards to each student, pairs or teams.
vocabulary: My Words: working with a set of vocabulary (connected by the topic or the text), each student has to choose five favourite words (the best, the worst, the most unusual, the strangest, the most interesting, the most difficult) and write them all on separate cards. Students can explain their choices, ask their partner a question with the word, make riddles with these or exchange their cards and guess their partner’s choices. Afterwards, the students repeat the activity with another partner.
vocabulary: write five words from the set of the key vocabulary, work with your partner, take out one of your words, randomly, put it on the table. Compare the two words, either using comparatives (works best with animals, transport, countries etc) or just say if they are similar or different taking into account their meaning, pronunciation, use, the part of speech they are etc.
vocabulary / functional langauge: Have you got…?: it is one of my favourite games with all the students, based loosely on Go Fish (or at least this is where it started). There is only one set of words that is necessary and students can help make these. The game is played best in 3 or 4 teams. Each team gets a set of the key words and the students take turns to try to guess what they partners have. As soon as someone guesses the word, the team loses it and puts the card away. The winner is usually the team that managed to keep all their words secret (ro the team that has most cards at the end of the game). Everyone has to listen to everyone else, collecting information and drawing conclusions. With my younger kids, we often play with ‘Have you got’ or even with ‘Blue, please’ during the first lessons of the course. With my older students, we turn it into proper themed mini-roleplays, for instance while practising the airport vocabulary, they have to ask ‘Excuse me, where is the departure lounge?’ and their partners reply with ‘It is next to the souvenir shop’ (if they have the card) or ‘Sorry, I don’t know’ (if they don’t have the card)
grammar: write five questions to ask your partner using the key structure (ie Did you go to the cinema yesterday?) or write five time expressions to use in the past to later ask questions with these words etc.
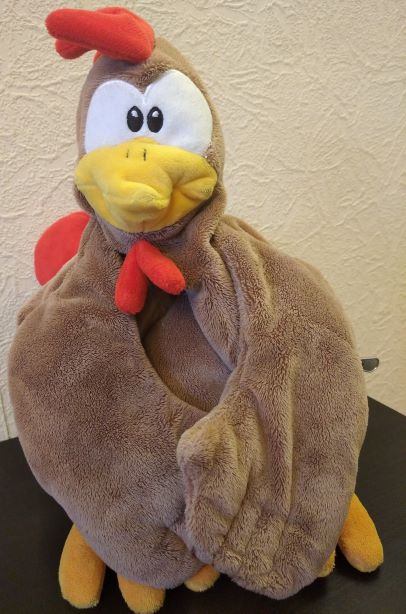
Nine: Puppets
Thinking about my classrooms now, I think there are at least two puppets occupying the shelves there, Angelina and the Flying Cow in the older kids classroom and Teddy and Orange Cat in the pre-primary classroom. If you want to find out how we use them, please pop in here.
Ten: The indispensables
This short (?) will be devoted not to teaching resources per se but to a whole selection of objects that I cannot imagine NOT being in my classroom
a clock, a big one, on the wall, right above the desk or behind the students’ back so that I can always be aware of the time and to proceed accordingly
a big box of felt-tip pens because we all like a bit of colour and a bit of variety when it comes to writing materials. The students always have a choice between a pen, a pencil or felt-tip pens and very often they choose the latter. Colour rules!
a roll of painter’s tape because you can use it to attach things to the walls (treasure hunts), to the floor (the plan of our ideal city), to the tables and chairs (assigning who is sitting there) and clothes (who is who today). The best thing – you can write on it so the teacher does and the kids do, too!
a big fat pencil case full of colourful whiteboard markers which we need to make the boardwork more appealing and to write in our erasable notebooks
If I ever went to Mars to teach, these are the things that I would be putting into my Mary Poppins’ rucksack. And you? What would you take?
Don’t forget to look out for the series of posts ‘When you suddenly land on Mars…’ in which I am going to share my ideas for lessons with pre-primary, primary, teenage and adult students, based only (or almost) on what we can find in every classroom: pen and paper! I have already started writing them and I will be sharing shortly!